Forms
Creating and editing survey forms
Each survey in Akvo Flow is created to capture data on a different subject. A survey can consist of one or multiple forms, which hold your questions that are organised into question groups. This chapter will show you how to create a new form in your survey, add multiple forms and edit a form.
Adding a form
Once you have created your survey, the next step is to add a form to the survey. Most surveys will only have a single form. At the bottom of the survey edit screen, click the ‘Add new form’ button.

Editing a form
At the bottom of the survey edit screen a form edit screen will be shown.
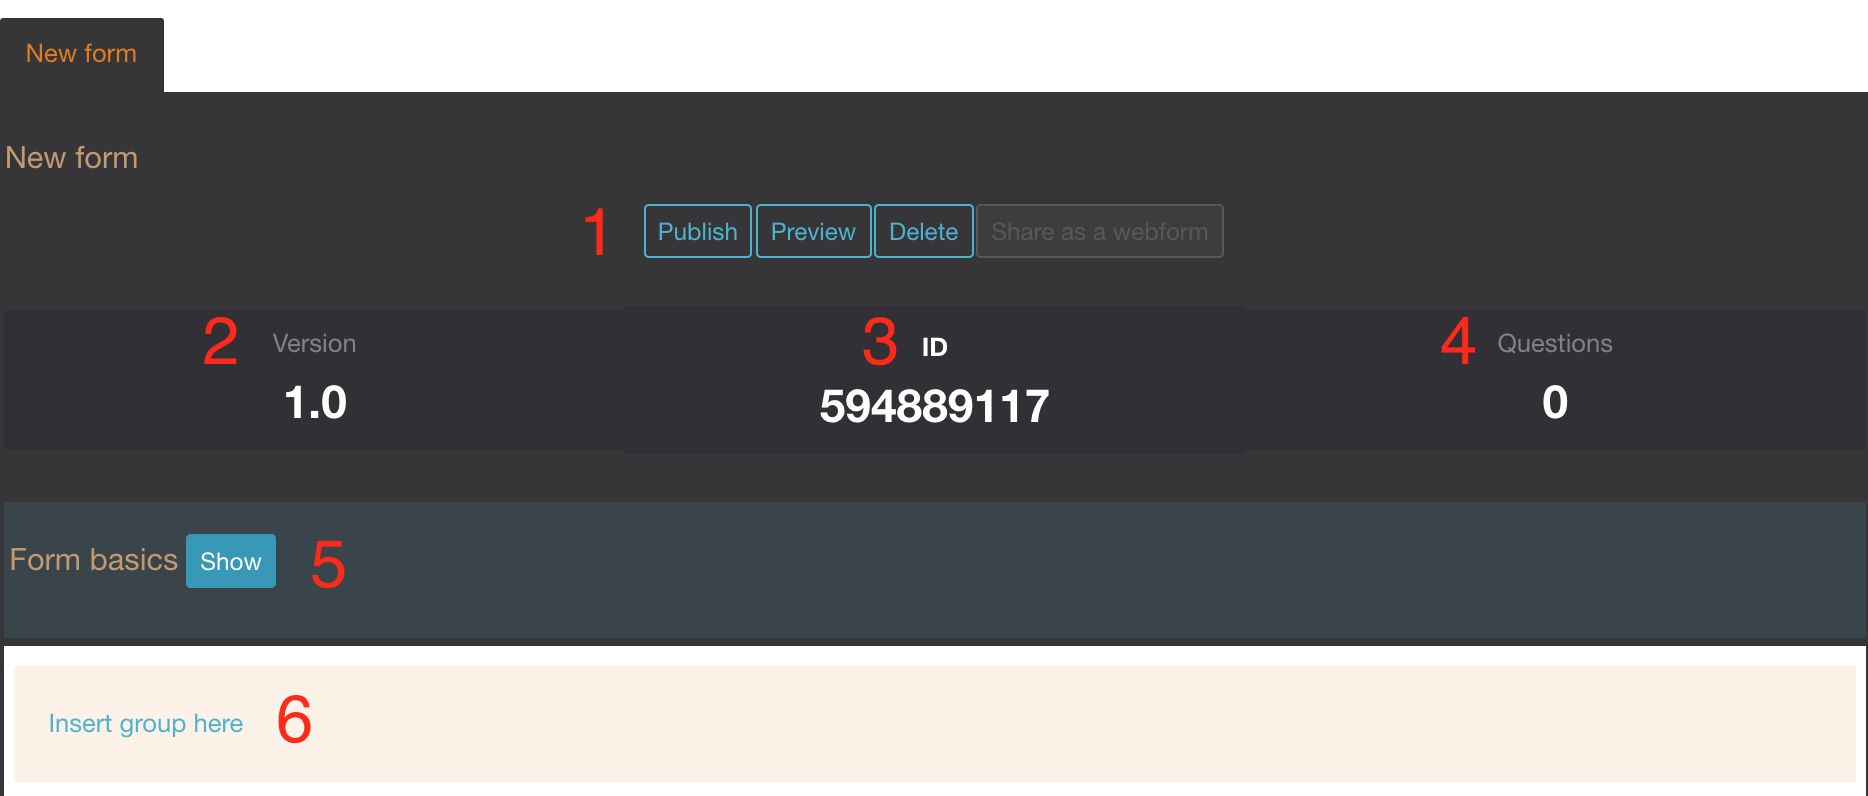
As the form edit screen holds multiple parts as well, we have numbered them. Le's go over them one by one:
-
Action items:
-
Publish the form once you are done editing it and it is ready for data collection.
- Preview gives you a look at how the form will show in the Akvo Flow app or as a webform.
- Delete removes the form fully. Please note that once you delete a form it cannot be recreated.
-
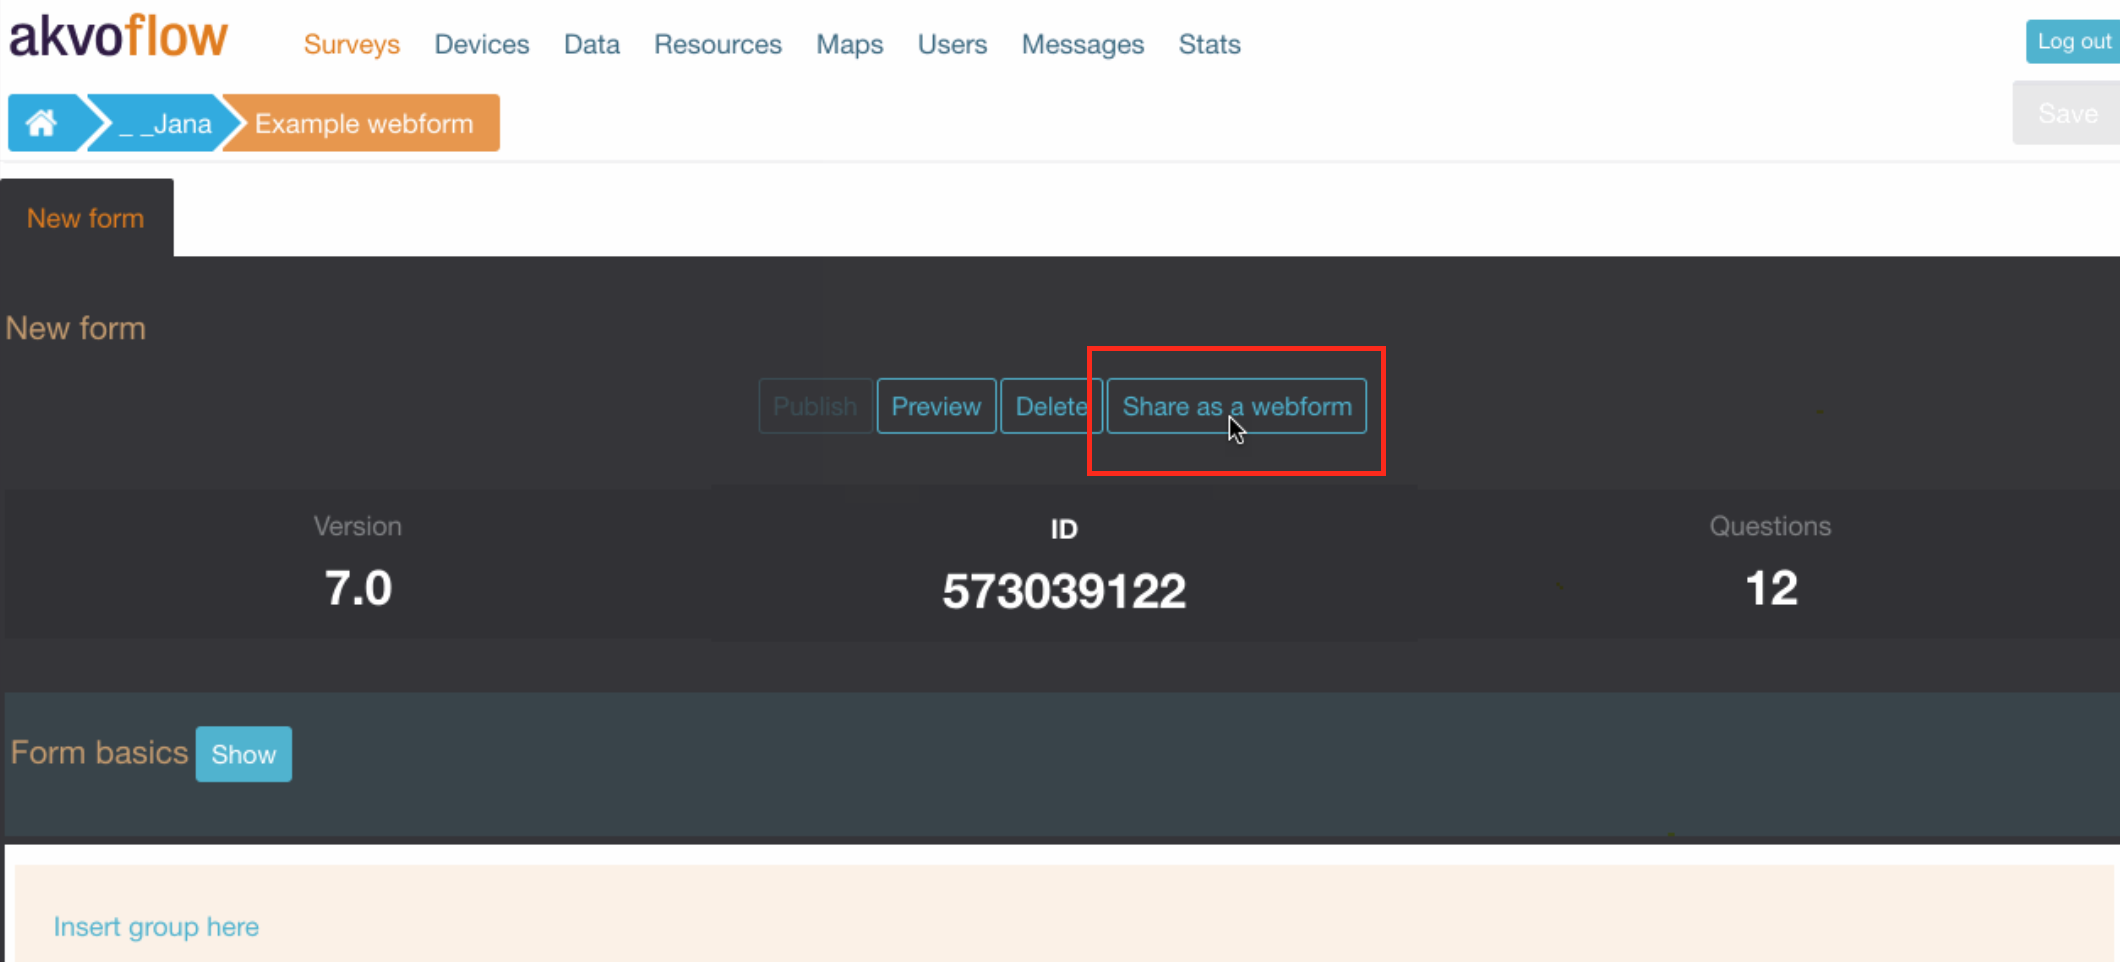
Share as webform enables you to collect data via the web browser on your computer or any other device. This is an alternative way to capture data besides the Akvo Flow app.
-
The version of the form. Each time a form is changed, it’s version is updated.
- The ID of the form. This can be used to manually download the form to a device.
- The current total number of questions in the form.
- Form basics. Here you can change the name of the form, add translation and notifications.
- Insert group. This inserts a new question group, which is the first step in creating the questions of the form.
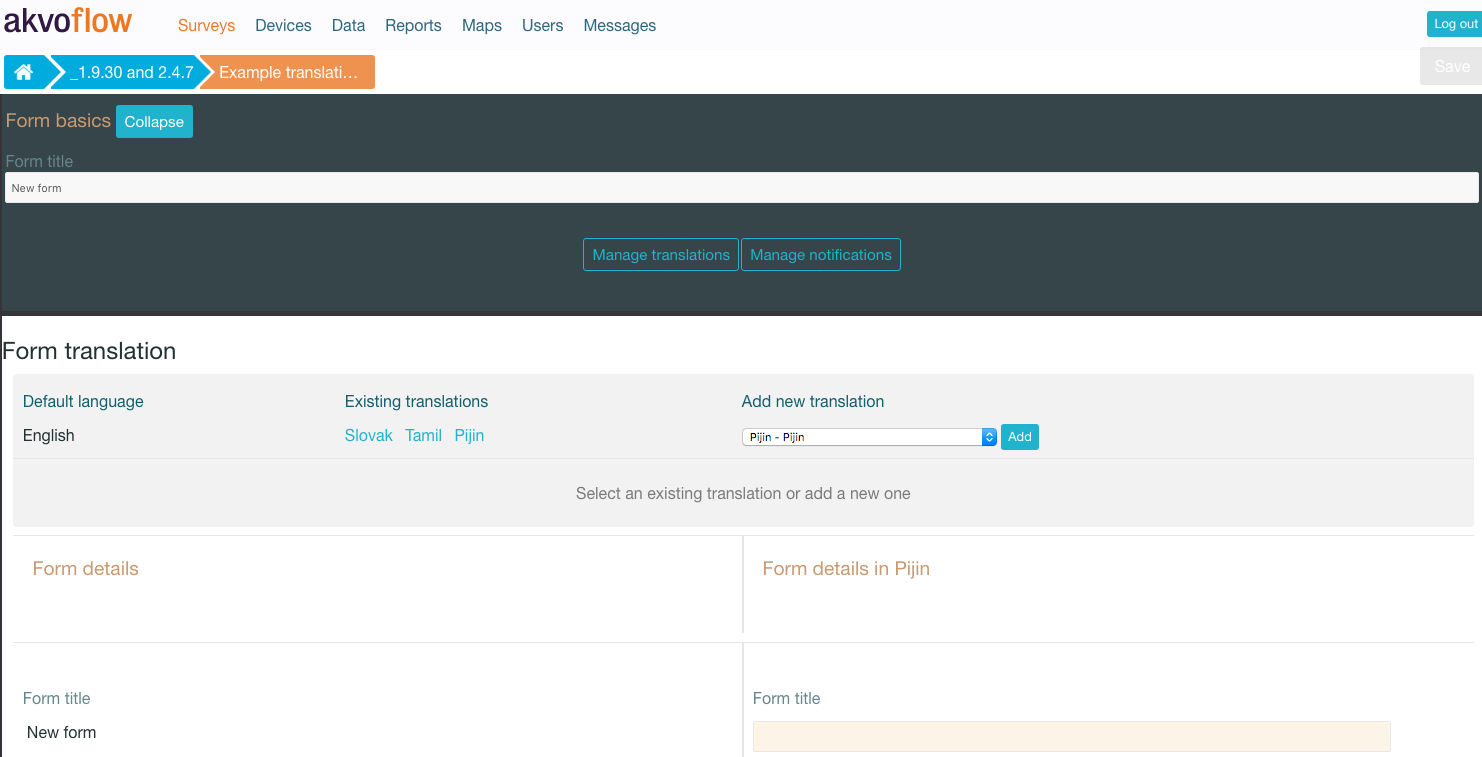
To change the name of the form select "Collapse" next to Form basics". You will see the screen below.
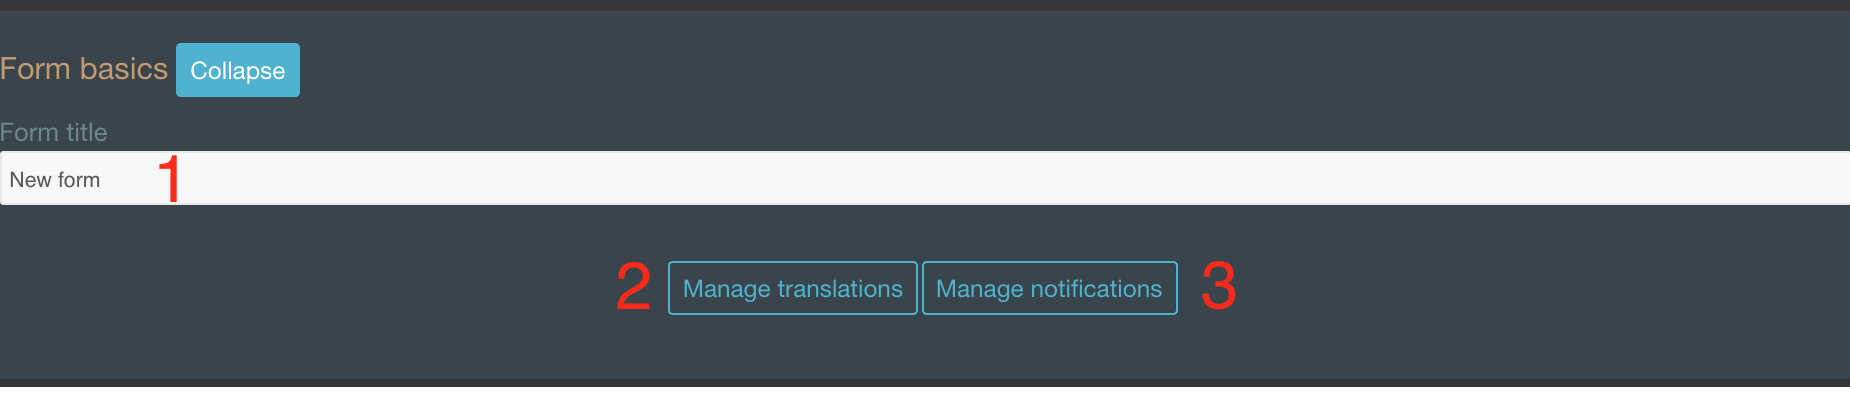
- The title of the form. This is the title that is also visible on the device. Make sure to Save it once you change the title.
- Manage Translations. Here, you can add multiple translations to a form, in any language
- Manage Notifications. Here, you can setup automatic distribution of data collected using this form.
Working with multiple forms
A regular survey will only contain a single form. However, you can add additional forms to a survey, which capture different aspects about the subject of the survey. For example, if you survey water pumps, you could have a ‘registration form’ that captures the basic information for a water point, a ‘water quality form’, that captures water quality information about that point, and a ‘functionality update form’ that periodically captures the functionality. More on how multiple forms can be used for monitoring is available here: Monitoring - tracking things over time. In this chapter we simply explain how to add multiple forms.
To add multiple forms to a survey, you first need to enable monitoring on the survey by clicking on the checkbox "Enable monitoring features. This will allow you to add more forms to your survey. When this has been enabled, you can create multiple forms.
In addition, you need to select the form which will be used to create new data points, which we call the Registration form. Other forms will just be able to update the existing data points. Please refer to Monitoring - tracking things over time for further details.

Next step The next step you want to do is to create a question group. Read more here.
Publishing a form
After you have created your form you need to publish it to make it available for data collection. After publishing, you can assign the forms of the survey to devices.
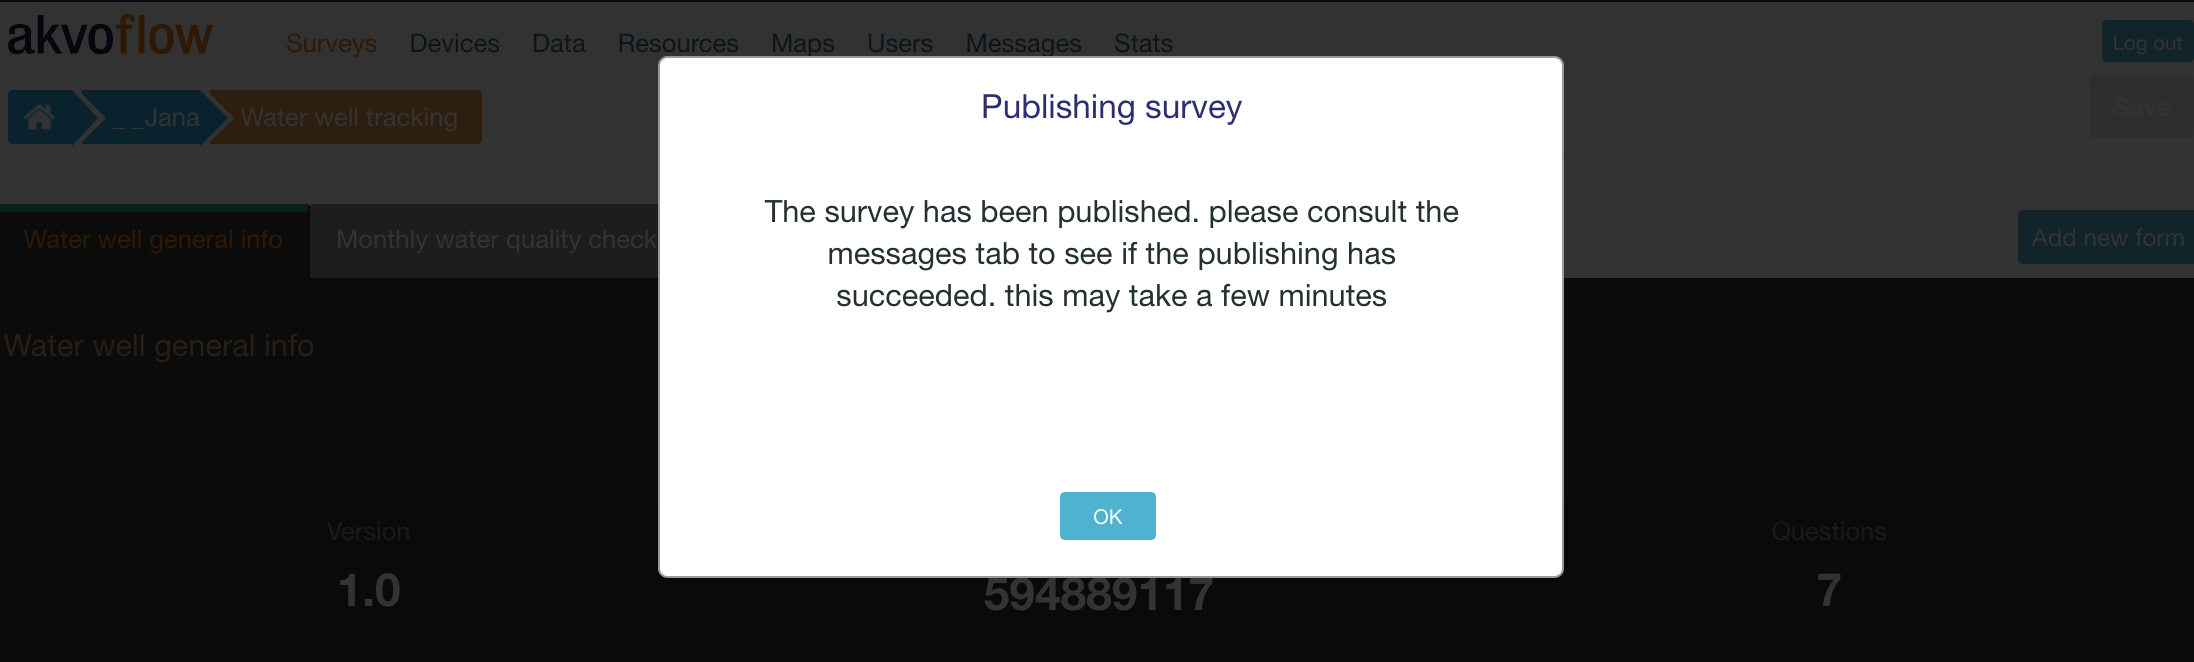
To publish a form, click the ‘Publish’ button at the top of your form editor. Clicking ‘Publish’ will not immediately update the publishing status of your form. This will only be updated, once the publishing is completed and you reopen the survey.

Clicking Publish displays a pop-up window: “Publishing survey: The survey has been published. Please consult the messages tab to see if the publishing has succeeded. This may take a few minutes.” Click OK to dismiss the pop-up.
In the survey, if there is an incomplete question e.g dependency was not fully set and you hit the publish button, an information box will pop up indicating that your form is incomplete highlighting the questions that need attention.
Click the 'Messages tab' from the top menu to move over to the Messages page to confirm survey publishing. Within a few minutes, an entry in the Messages table should appear with the information for the survey just published (Date, Form ID, Survey, Type, Message).

When you return to the Edit survey screen, you’ll see that the version number of the forms has been updated, and the status of the forms now shows as ‘Published’.
Previewing a form
At any point, you can preview a form by clicking the preview button. The form preview shows you a preview of the entire form.
At first, it will show you all of the questions in the survey. As you start to fill out the form, it will adapt according to any dependent questions you might have defined. Any responses filled in the preview screen will be discarded when you close the preview window.
Webforms
Do you need to collect data but cannot go to the field? Do you want to quickly get answers about the harvest of farmers in your project? Are you thinking of crowdsourcing your data collection on the latest status of water points? Do you want to do phone interviews easily, and more?
Besides collecting data with the Akvo Flow app, you can now share forms and submit data via webforms. Submit data from your computer or any mobile device using the browser and Akvo Flow Webforms.
Create a webform
A webform can be created form almost any Flow form. To use webforms the form:
- Must to be published
- Cannot be a monitoring form
- Cannot hold the following question types: signature, geographic shape and Akvo Caddisfly.
If your form is suitable for data collection via webforms, the 'Share as webform' button will be enabled. Click on it, copy the URL of the webform and remember the password. You will need it to finalise the submission.
Submit data with webforms
Webforms can be opened in any browser, just use the link provided. Do not forget the password, you will need it in the end to make the submission.
Webforms behave as the forms on the Akvo Flow app. Click through the question groups, upload photos and make sure you fill in all mandatory questions market with a red exclamation mark. The webform also gives you an overview of the total number of questions still missing data. To switch languages of the webform, check the checkbox under Localisation.
Manage Translations
Translate your forms on the online space into multiple languages and then make those available on the Flow app. When in the field the data collector can see the form in the main language, switch to any of the available translations or even see the form in more languages at once.
You can translate your form to one extra language or multiple. You can translated the question text, question options, and tooltips. The translations of the survey title, form title and question group names aren’t available on the device yet. (You can translate them in the online space but the translations will not be shown in the Flow app.)
Every survey has a master language. This is the language in which you will first create the survey, and the language in which you will view and edit data in reports, charts and maps. You can always create your survey in any language you want and this will be the primary language of your survey.
There are 185 languages available in the language list and many languages with a non-Roman alphabet or ones reading anything other than left-to-right work as well. However, we do not guarantee that all languages will work on the Flow app as they require a special character set and support on the device. Please contact Akvo to learn more about this.
Translating your form
To translate you form to one or more languages go to the Form Basics and click the ‘Manage translations’ button. Along the top you’ll see the default (master) language, the existing translations (if you’ve created any) and an ‘Add new translation’ dropdown. Below that, you’ll see the original questions in your form on the left, and the space where you add the translation on the right.
To translate you form to one or more languages:
- Select the language you want to translate your form to in the dropdown.
- Click on the 'Add' button. Now your selected language will show under Existing translations.
- Enter translations for each survey question, tooltip, and question option (if it’s an option question).
- After translating your first group of questions, hit 'Save'.
- Move on to the next group and repeat.
- Once done hit the 'Save and close' in the bottom of your screen.
You can also add multiple translations to a single survey form by selecting another language from the Add New Translation dropdown and clicking ‘Add’. If you have a survey with more than one form (monitoring survey) you add translations to each form separately. You can also have one form translated to two languages and the other one to three and the languages differ.
When you have completed the translation(s) of your form, don't forget to 'Publish' you form. Publishing will not only publish any changes made to your form but also the translations you just added.
Read about using translations on the device in Languages.
Manage Notifications
Notifications are event-based messages about Akvo Flow survey activity sent to you via email. They are set at the survey level, and can be sent to any valid email address, regardless of whether the email address belongs to a registered Flow user.
Notifications are either tied to certain events (survey approval, survey submission) or run at set intervals (nightly raw data report if new data has been submitted).
To set up notifications: Select the survey and form for which you want to set up notifications. In the form click on the ‘Manage Notifications’ button. This will bring up a screen where you can enter the details of each notification.
Enter the recipient’s email address; select an Event type, Option and expiration date. Click 'Add' and you will see the details appear below.
The email address to which the notification should be sent. Does not need to be a registered Flow user.
Event
- Raw data reports (nightly) - generates and sends a raw data report each night if new data are submitted for the survey
- Survey submission - send a notification each time a survey is submitted from the field (note: this can product a high volume of emails)
- Survey approval - send a notification each time a survey is approved Option
Choose whether to include a download link in the email, or to send any file as an attachment
Expires
Choose the end date for notification. After this date the user will no longer receive emails for the selected survey event.
If you want multiple event notifications sent to the same user, you must enter them individually.
To delete a notification, locate it in the list of existing notifications and click Remove. To return to the Edit Survey screen, click Close Notifications.